Hi! I'm Ginger from Ginger Snap Crafts. This is me & my two daughters.
I've also got a fabulous husband & 3 handsome sons. My blog is full of fun, cute & easy ideas.
I Would love for you to drop by sometime! I'm so excited to be over here at Someday Crafts.
Michelle is one of my favorite bloggers, & it's a real treat to be here. Thanks, Michelle.
Speaking of treat! Halloween is almost here! Yeah! It's one of my favorite holidays.
Today I'm going to show you how to makes these Halloween inspired Smelly Jellies.
{Really these could be made for any holiday...Christmas is coming up, too!}

If you have never heard of a Smelly Jelly...you've been missing out!
They are super easy to make, & they smell so good!
You can just set the jars out or you can use the the jelly
in potpourri warmers for a stronger fragrance.

What you'll need: water crystals (You can find these on ebay for super cheap or try a local candle making supply company. When I lived in Ft. Worth, Texas I always got mine from Lone Star Candle Supply. Love them!), containers (I used mason jars.), water, fragrance oil and food coloring


I thought it would be fun to decorate my jars for Halloween. I cut out some spooky Halloween vinyl using my Silhouette & clip art. (If you don't have a have a vinyl cutter don't worry. You could use stickers or paint pens to decorate your jars. I've also just left them plain in the past. Either way will do.)


You'll fill your jar with about 12 oz. of water. Add 2 teaspoons of water crystals,
and then add 1 to 2 teaspoons of fragrance oil to your water.


Add food coloring. Then stir.
I always just use a popsicle stick to stir so I can just toss if out when I'm done.

Now set your jars aside for an hour or two.
The water crystals will absorb the water, fragrance & color & expand...they'll get huge.
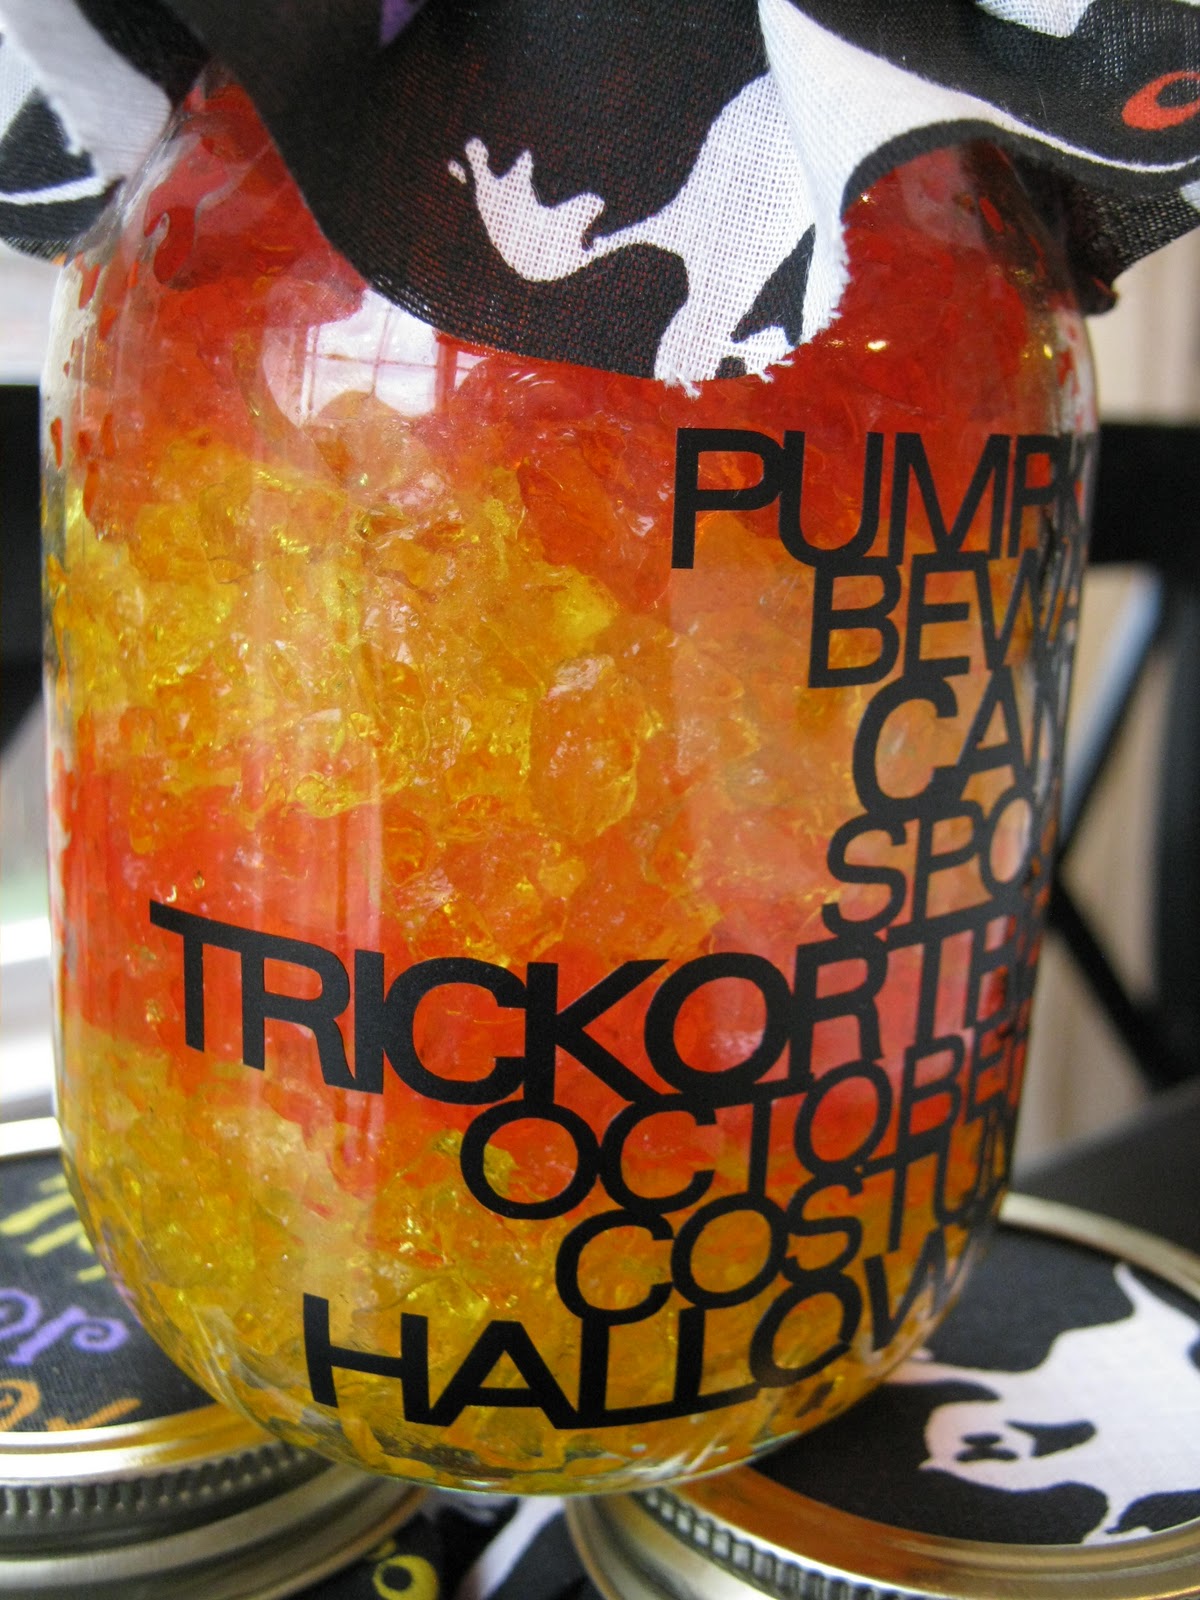
Then you can just add a fun Halloween fabric cut in a circle on top with just the ring of your jar.
Hope you enjoy!
If you get a chance I'd love to have you drop by Ginger Snap Crafts.
Here's a few of my most popular post.
Family Wall


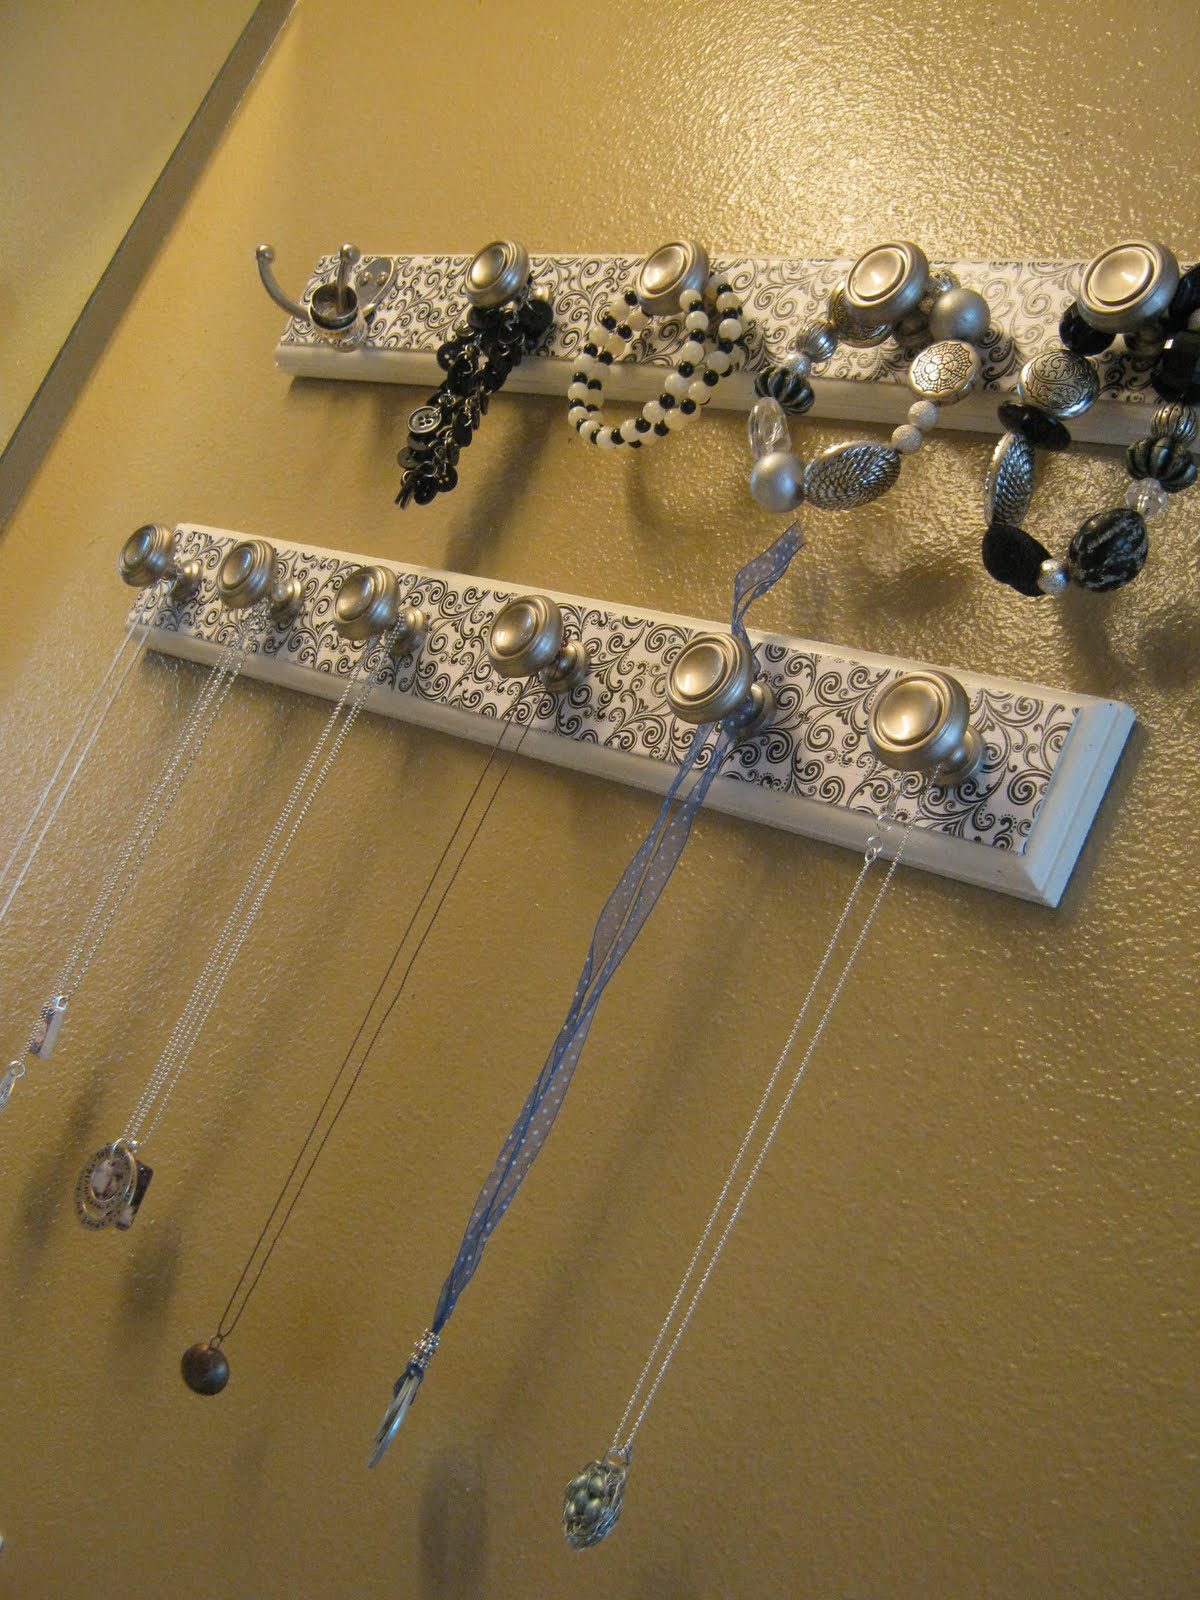
jewelry organizer
I also have a popular link party on Wednesdays!
Would love for you to drop by sometime!

Thanks for having me over, Michelle!

Ginger has such great ideas - ALL the time. Visit her rapidly growing blog, Ginger Snap Crafts to get some awesome ideas!