Showing posts with label flower. Show all posts

Thursday, October 13, 2011

Guest Blogger - Better Together - Rose Bath Mat


Hi! I’m Angela from
Better Together.
I blog with my two sisters Whitney and Lauren. We created our blog to learn from each other and to help inspire each other to be a little better everyday. You can find a variety of topics over on our blog. We talk about everything from crafting and sewing to cooking and nutrition. We even offer fun exercise tips.

 
button3 copy

I am so excited to be here on Someday Crafts to share my new rose bath mat.

SONY DSC


Let me show you how to make your own rose bath mat. All of the skills needed to create this were learned in Kindergarten. Seriously, if you can cut and glue than you can make this rug. That is how easy it is to make. As far as materials go for creating this you will need a rug, an old T-Shirt, some felt or fleece, a hot glue gun, and some scissors.


SONY DSC

You are going to start by cutting your T-Shirt into 2-3 inch strips.


SONY DSC


Then you are going to cut out circles from the felt or fleece. You will cut them in various sizes depending on how big or small you want your flowers to be. Place your circles in the pattern that you would like on your rug. Originally I was going to have three large flowers and five smaller flowers spread across my rug. My husband wasn’t too sure about having a rug full of flowers, plus he was worried that the rug would loose some of its comfort. So we compromised, and I ended up only putting three large circles and three smaller circles on half of the rug. Now we each have our own side of the rug. I think the flowers are just as comfortable, if not more so than the original rug.

SONY DSC


Next you will make your flowers. Take your cut T-Shirt strips and start wrapping them around the circle. Once one T-Shirt strip has come to an end, just add another. Keep wrapping the strips around the circle until you have the desired flower effect. Now all the while you are doing this you want to be gluing the strips to your circle.

SONY DSC

Just keep making as many flowers as you want for your rug. Like I mentioned before, I went with three large flowers and three small flowers.
SONY DSC


Once all of your flowers have been created, then glue them onto the rug.

SONY DSC

I love the end result. It looks perfect in my bathroom!

SONY DSC


Thanks for taking a look at my new bath mat! Feel free to stop by our blog Better Together for some other fun creations, like this napkin skirt or my new cork clock.

DSC05419 SONY DSC


You can even check out our Facebook page. We are offer free printables every month and this month we are offering some free Halloween cake toppers.


halloween cake toppers2011


41D7BC788C40AFDD713E5833753FB8F5

THANKS, Angela.  I'm digging that bath mat.  It is so beautiful and that bathroom of yours is to die for.  Love the exposed brick and clawfoot tub!  The mat is the perfect addition to a gorgeous bathroom.   Visit Better Together today and say HI!!!!

Thursday, August 11, 2011

Shabby Flower Clutch

I was too busy to get a post of highlights up from the party yesterday, but I think this evening clutch was my favorite project. I love the bow and the flower-type material made by Inspiration and Realisation. So pretty.


Saturday, August 6, 2011

Guest Blogger Re-run - Bird Crafts - Plush Fabric Flowers


This is another guest blogger re-run from one of my first guests! I love this tutorial!


Hi everyone, I am Bird from the Blog


Bird's Party


I live in France with my husband, my two little cherubs (most of the time..), my dog and my sewing machine. We used to live in the England, but moved here nearly ten years ago to start a brand new life à la française! Since discovering the wonderful world of crafts, I am totally hooked and can honestly say that “I’d rather craft than bathe?!” (lol)


I started blogging last November and I’m loving that too! I love to chat and to write (as you’ll find from this post) but I also enjoy making new friends. So feel free to leave me looooads of comments!! :)


At Bird Crafts, I blog about sewing, DIY, home décor, party ideas, thrifty finds, tutorials and recipes - If it’s handmade, chances are I’ll post about it! So after reading this, don’t forget to pop over and have a snoop around!!


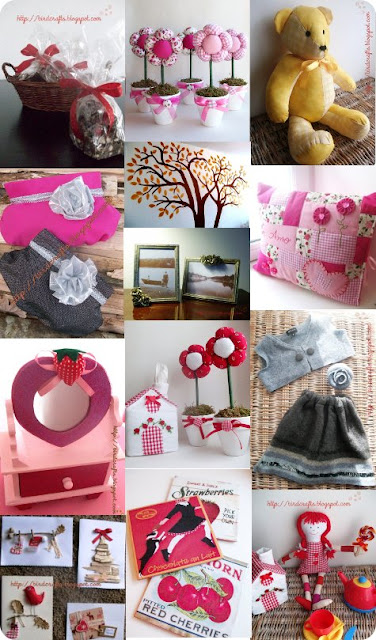
Here is a sneak peek at some of my stuff…


By Bird Crafts


Now to the reason I’m here: TUTORIAL TIME.


Today my friends, I am going to show you how to make these super cute

Flower Pots


They are very simple to make and so versatile. Think gift ideas, decorative items for your home, or a party table centre-piece!! If you make this or use it in a craft project, please don’t forget to link back to Bird Crafts!

At the end of the tutorial, you can visit my etsy shop, so keep reading…

What you’ll need:


  1. Patterned fabric for the flower petals. I’m using yellow gingham.


  2. White fabric for the flower centre.


  3. A small clay pot


  4. A 23 cm piece of dowel rod or bamboo


  5. Florist tape


  6. Fabric pen or pencil


  7. Needle and thread


  8. Scissors


  9. Floral sponge (oasis)

  10. Natural moss

  11. Synthetic or bamboo fibre

  12. Glue gun


How to do it:

A. The Flower Head

Using a saucer or round lid as a guide, draw and cut 5 circles from your patterned fabric. I used a 10cm diameter lid.

Draw and cut 2 more circles from the white fabric. Now you have 7 circles!

Do a running stitch around the edge of each circle as shown below


When you’ve gone all the way around, pull the thread slightly to get a small “pouch” and fill with the fibre.


Finish pulling the pouch closed and secure with a couple of stitches.


Repeat for all the other 6 circles.


Now to assemble the flower head. Starting with the petals (patterned fabric), stitch them side by side until you have all the 5 petal joined up.


Using your glue gun, now glue the flower centres (white balls) in the gaps to get the flower head you see above.


B. The Flower Stalk and Pot


Cover your rod or bamboo stick with the florist tape.

Stick your floral oasis into your clay pot and using the glue gun, glue the stalk in the centre.

Using the glue gun again (I just want to kiss the person who invented this!!) glue some moss to hide the floral oasis.


Finally, carefully pull apart a couple of petals on the flower head, apply some hot glue and secure it to the stalk.


Embellish the vase to your liking. I used ribbon and a fabric-covered button to match.


And there you have it, a cute little Flower Pot that would brighten up any window sill!!


If you don’t fancy making these yourself, I am selling them in my Etsy shop :) I also sell plush tulips.
Thanks again Michelle,


Wow! Thanks, Bird. Are those Plush Flowers in Pots cute or what? I could see a few of them in different colors throughout my house - especially in my daughter's room. Bird Crafts is an amazing blog (and she speaks three languages). Don't you love the collage of some of what you can find on her blog? EYE CANDY!!! I love her etsy store too! Go visit Bird Crafts today and become a follower if you like what she creates!

Sunday, July 3, 2011

Guest Blogger - My Life and Kids - Felt Flower Magnets


Hi, I'm Anna. I had three kids in three years, and whew, has my life changed. Just a few years ago, I had a great job, lived in the city with my hubby and my dog, and I had a social life. Then we had our three kids, I turned 30, we moved to the suburbs, we bought a minivan, and I quit my job. Can I get some mom jeans to go with my new life?


Now I spend my days with two toddlers and a baby, and I spend my naptimes doing crafts and fixing up the neglected house we bought in the suburbs. And in my spare time, I blog about it all at


My Life and Kids.

Now onto today's tutorial.
Felt Flower Magnets


These little beauties look so lovely on my fridge. And they're my new favorite gift to make for friends and family. Now you can make them too!
I first saw something like this in Woman's Day magazine. They used buttons and created them as pins. I loved them instantly, but I didn't feel like I'd get enough use out of it as a pin. So I changed things up a bit and made them into magnets. (You can see the Women's Day tutorial
here.)


Supplies:

1 or 2 coordinating colors of felt


Button, earring, jewelry - something round that you can use in the center
Measuring tape or ruler
Scissors
Needle and thread


Pins


Glue gun
Magnets (.75 inches in diameter work the best)


Cut the larger piece of felt (the color that will be the back of your flower) into a 2 1/4" wide strip. And then cut the length down to 6".


Fold it in half lengthwise, and pin the long edges together.


Cut slits along the folded edge. You can play around with how wide you want them to be. You really can't mess this up - just don't cut all the way through the felt. Leave about a 1/3" uncut border along the bottom - but it doesn't have to be exact.


Using your needle and thread, sew a running stitch all along the pinned edge. As you sew, tug at the thread so that the sewn edge gathers and begins to form a circle. (You won't be able to see the thread, so any color will work.)


Once your circle is fully formed, cut off the excess felt, leaving the needle and thread still attached.


To keep your gathers in place, sew a running stitch back through the circle around the sewn edge.


Join the two ends of your circle together by folding it in half. Sew a few whipstitches along the edges to keep it together. Start at the center of the circle and end it where the slits begin. Knot your thread and cut.


Your circle should look something like this. See? It doesn't have to be perfect.


In your coordinating color of felt (this will be the inside circle of the flower), cut a 1 3/4" wide strip and then trim it to 6" in length.


Follow the steps above to sew a second, smaller circle.


You should have two circles like this.


Fire up your glue gun, and glue the smaller circle on top of the larger circle.


Then glue your button, earring or jewelry on top of both circles to cover the hole in the middle. I used an old clip-on earring here.


The back of your flower won't be so pretty. No worries, just glue your magnet onto the back.


Ta-Da!


These magnets are the perfect way to dress up a fridge, magnet board, locker or tin bucket. And they make wonderful gifts!


Stop by My Life and Kids to see my other tutorials, like making curtains out of twin sheets, creating a US map out of scrapbook paper and what to do if you accidentally toss a disposable diaper into the washing machine. Yikes!


Want to know how to make these little guys? Visit http://www.mylifeandkids.com/

and click on My Tutorials.


THANKS, Anna. I need more cute magnets to hold up all my kids' artwork. These could easily do the trick! I don't know how you do three kids in three years. I'd go insane! I will have to read back to the beginning of My Life and Kids and learn all your secrets!!!! Visits My Life and Kids today!