There's always something fun about scrabble tiles and these pillows definitely are fun! Just Call Me Martha Stacey made them for her couch! They would be cool on a bed too!
See the scrabble tile pillows!
There's always something fun about scrabble tiles and these pillows definitely are fun! Just Call Me Martha Stacey made them for her couch! They would be cool on a bed too! I love this scrappy fall pillow at Pickup Some Creativity. The fabrics she used look so good together and the stitching adds great detail. That would look so fun on a couch or a chair.
 Fall decor is starting to show up and I'm so excited about it! Gather all those fall materials and make some pretty crafts like this fall wreath at Love Laugh Create.
 Naptime Crafters built this amazing play kitchen with running water! My kids would have WAY TOO MUCH fun with this in their playroom!
 This tutu lamp would be a dashing addition to a girl's room or anywhere to do with dancers. Apothecary Home made it so frilly and beautiful.
 Add a little touch of whimsy to a couch, chairs or a bed by adding some fun his and hers pillows! See these at Let's Make This Pretty.
 The fancy stitching on pants is quite the rage. You can make pants that are rockstar worthy by doing what I Am Momma, Hear Me Roar did.
 Stencils are being used on so many things right now including clothing. Brassy Apple stenciled a skirt to make it super fabulous.
 Another thing you can stencil is the tops of table and benches. This one by Tattered and Inked looks so spectacular.
 What could be trendier and cuter than this chevron ruffle pillow? Nothing! It looks amazing on Crazy Wonderful's chair in her living room! I want one!

Join Ricochet and Away and Sew La Vie for The Retro Pillow Challenge! You can use this technique to make the winning pillow!
 Make an easy and inexpensive headboard with the help of A Step In The Journey. This would look so cute in a beachy type bedroom (or really any type of bedroom.)
 It is hard to find short sleeve, light weight cardigans for warm/hot weather. However, with this idea from Life Is Just A Bowl Of Cherries, a summer cardigan is totally doable. She made a cardigan from a t-shirt! Sweet! (It would look great even on someone who is NOT pregnant!)
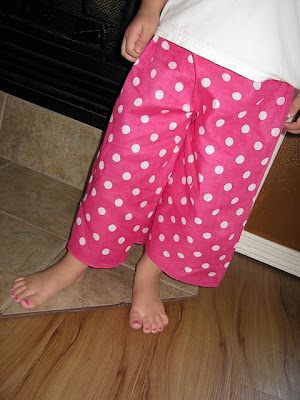 I love all things bandana so these bandana shorts/pants tutorial stood out to me. I think the paisley bandanas would make adorable short/pants. See the tutorial at Ginger Snap Crafts.
 This is one awesome bedroom for a little boy! I love ALL the details of the rooms! Check out everything about it at Life As We Know It.
 Nap Time Crafters created this darling summer romper using a fitted bed sheet. No elastics. No casing! Save LOTS of time. Check out this tip because I think it is pure genius.
  This pillow is rufflicious! Wouldn't that look great on a couch, bed or chair? See this ruffle pillow at Ameroonie Designs.