Showing posts with label lamp. Show all posts

Monday, October 10, 2011

Guest Blogger - Teal and Lime - Quatrefoil Drum Lamp


Hi, I'm Jackie. I am so excited to be guest posting here today and so thankful Michelle took a chance on me! This is my first ever guest blog post, so I did my homework and came up with an amazing tutorial to share.
Introducing Teal & Lime

 
I am a happily married, working mother of two busy little boys. I decorate and blog in my spare time, or lack there of. I just can't help myself. My blog Teal & Lime is about creating a DIY modern home. I like to say, "my style is modern, my home is getting there one room at a time". I hope you will join in and see my home transform from builder basic to modern beauty. I love to DIY and share tutorials so you can DIY too.


Today I want to share a tutorial to turn a plain drum shade into a statement piece for less than $10. I made my own drum shade pendant for less than $75, but I wanted to dress it up a bit. I originally planned to stencil a design on the shade, but the fabric on the shade has a lot of texture and I was nervous about getting a crisp design with a stencil. I brainstormed a fabulous alternative to create a modern design with appliquéd fabric. I love, love, love the way this turned out. The pattern and color are so crisp.

 
Lampshade Applique


Here is how I did it:


Supplies:
  • Drum Shade (circumference at the top and bottom of the shade is the same)
  • Fabric (I used solid-color quilting cotton)
  • Fusible web
  • Mini Craft Iron (with a 50% off coupon you can get one for less than $20)
  • Sharp scissors
  • Clothespins
Step by step:

  1. Measure your shade height and circumference. If the shade has a binding at the top and bottom, measure the height from the inside edge of the bottom binding to the inside edge of the top binding.
  2. Using the measurements from Step 1, cut out a rectangle piece of fusible web.
  3. Create your design. Geometric designs work great for this project. I decided on a quatrefoil design, which I designed to fit evenly within the size of my rectangle. Learn more about how I chose my fabric and created my design.Hand Drawn Quatrefoil Design
  4. Trace your design onto the paper side of the fusible web. Tip: For a complicated design, shade in the areas to be cut away.Trace design onto fusible web
  5. Iron the fusible web onto the wrong side of your fabric.
  6. Trim fabric to same size as fusible web rectangle.
  7. Cut out your design to remove all the shaded areas. I also split my design into three sections to make it more manageable. Quatrefoil Applique Design
  8. "Dry fit" your design by lining up each section around the drum shade with the fusible web side against the shade. Use clips or clothespins to hold the fabric in place. Drum Shade Applique
  9. Starting with one section, peel the paper backing off the fusible webbing and repin the fabric to the shade. Line the fabric up very carefully.Preparing to applique a lampshade
  10. Use the mini craft iron on medium heat to fuse the fabric design to the lamp shade. Use light pressure and keep the iron moving to avoid denting or warping the lamp shade.Mini Craft Iron
The finished lampshade is beautiful! You would never know it didn't come this way. The thin cotton fabric fused so smoothly, it looks like part of the fabric on the shade.


Drum Shade Close Up

 
This lampshade is right at home in our breakfast nook where we eat all of our meals. The green coordinates with the bits of green in the chair back covers. I love the boldness of the light now!

Drum Shade Pendant Light

 
Want more fun tutorials and inspiration? Follow Teal & Lime on Facebook and check out these Teal & Lime favorites:

 
Turning tablecloths into slipcoversModern Milk and Cookies Party


Family Photo Gallery Wall

 
Thanks so much for having me Michelle!

THANK YOU, Jackie for that awesome tutorial.  I can think of many cool designs (or words) to put on lampshade using your tutorial.   I love the colors in your house!   Head over Teal & Lime and say hi!!!   She is a very talented gal and her blog is so clean and crisp!  It's beautiful!

Thursday, September 29, 2011

Guest Blogger - Coley's Corner - Wine Glass Lamps


Hi y'all! I am so excited to be guest blogging here at Someday Crafts today!


I'm Coley and my home on the web is called


and I share craft projects, recipes, cool photos, and write about and advocate for children with special needs, most specifically my son Noah who has cerebral palsy, epilepsy, and is borderline autistic.


A few of my most popular/favorite posts are:


Today I'm going to teach you how to make these fun, easy, and inexpensive wine glass candle lamps for Halloween.


To make this project you are going to need:


2 wine glasses (Check thrift stores and The Dollar Stores to get them cheap.)


2 battery operated candles (I found these at The Dollar Store as well.)


Scrapbook Paper (If you are using 12 x 12 you can get 2 shades out of 1 sheet.)


Cardstock


Glitter Paint


Paint brush


Sticky Strip or Terrifically Tacky Tape


Dimensionals or Pop Dots


Scissors


What You'll Do:


1. Print out your template and cut it out. Trace it on to the back of your scrapbook paper and cut it out. (You may want to practice on a piece of scrap paper first just to make sure you don't need to adjust the template any to better fit the size of your particular wine glass.)


2. Cut a piece of sticky strip to fit the shade and place it on the back of the scrapbook paper which will be the inside of the shade.


3. Adhere the shade together using the sticky strip.


4. Now comes the fun part - decorate! Cut out a few little spiders out of cardstock. I used my Silhouette to do this but you could free hand them, find one online, or use a sticker. Paint the legs of your spiders with glitter paint just to give them a little shine.


5. Adhere your spiders to your shades using pop dots.


6. Add your candles to the wine glasses and pop on the shades!


So cute!


The great thing is you can easily make more shades to switch them up for different holidays......


Like Thanksgiving or Fall


Or for Christmas!


And don't forget every day!


Thanks Michelle for the opportunity to guest blog and I hope each of you will stop by my blog, Coley's Corner!


I love Coley's Corner. She touches my heart as I read about her son! Coley is an amazing person. I love her crafts and ideas too! You have to go read about her cute son! Check out Coley's Corner!

Wednesday, August 31, 2011

Wednesday Highlights


You ladies are too fantastic! Do you have any idea how hard it is to narrow down highlights from the weekly parties? So hard. Here are a few I love this week.


Fall decor is starting to show up and I'm so excited about it! Gather all those fall materials and make some pretty crafts like this fall wreath at Love Laugh Create.


Naptime Crafters built this amazing play kitchen with running water! My kids would have WAY TOO MUCH fun with this in their playroom!


This tutu lamp would be a dashing addition to a girl's room or anywhere to do with dancers. Apothecary Home made it so frilly and beautiful.


Add a little touch of whimsy to a couch, chairs or a bed by adding some fun his and hers pillows! See these at Let's Make This Pretty.


The fancy stitching on pants is quite the rage. You can make pants that are rockstar worthy by doing what I Am Momma, Hear Me Roar did.


Stencils are being used on so many things right now including clothing. Brassy Apple stenciled a skirt to make it super fabulous.


Another thing you can stencil is the tops of table and benches. This one by Tattered and Inked looks so spectacular.


See more Whatever Goes Wednesday links.


Tuesday, May 17, 2011

Driftwood Lamp

Every once in a while, I find ideas that I love but will probably never do for one reason or another. I call it eye candy!

I absolutely think this lamp made from driftwood is gorgeous! What a spectacular piece Simple Life has made! Definite eye candy!


Wednesday, April 27, 2011

Some Party Beauties!


I never could highlight all the beautiful and tasty creations at every party! It's so hard! But here are a few that I love!!!!


Seven Thirty Three made over her master bedroom and it is to die for!!! I'm loving the colors and design. But most of all, I love that beadboard wall headboard! It looks awesome!


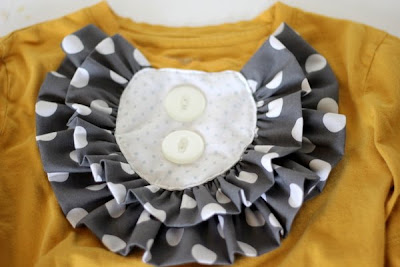
I'm loving this ruffle refashioned shirt from See Kate Sew! Darling and super stylish!

Chameleon Girls made this outrageously cool book lamp! Such a great idea for one who loves books (and can part with a few!!!)

What do you do with all those plastic eggs left over from Easter? Especially the ones that have one side broken or lost? Well, you should make a few into these plastic egg tea cups like The Moody Fashionista. Such a fun idea!!!


I want to plant some flowers in some rain boots! I love this spring display from Blueberry Craft and Hobby Time.


Check out more links from the Whatever Goes Wednesday party!


Thursday, March 3, 2011

2 AWESOME Lamps

Due to my computer acting strange, the Giveaway Directory will post around 2pm MST today. Sorry for the inconvenience!!!
Not Just a Housewife created this awesome looking lamp!!! It is made from lots of wood circles! Check out the scrap wood circle lamp.

Or maybe you like the rustic, weathered look of this barn wood lamp better! Check out this baby at Not Just A Housewife too.

post signature